Whether you’re a front-end graphics designer or a back-end web programmer, if you’ve worked long enough in the field of creating web-based solutions, you’ve no doubt heard about an extension for the Mozilla Firefox web browser called (simply enough) the Web Developer extension. If you have no clue what I’m talking about, here’s a brief overview from Webs Tips to get you familiarized with this wonderful tool.

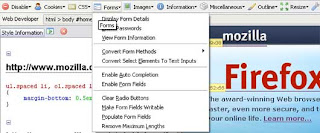
This article lists some practical, everyday uses of the Web Developer extension to help improve your web-building methods. I’ve tried to stay away from the more common and basic uses of the Web Developer extension like
troubleshooting layout issues with the
Information > Display Div Order option because I feel these have been discussed quite enough in other places. New users, don’t run away quite yet, I think this guide will help you get a rapid jump start into applying this tool into your daily development routine.
So without further ado, here’s nine highly pragmatic uses of the Web Developer extension for Firefox.
1) Change XHTML on-the-fly without changing your web files.
Unfortunately for many developers, we don’t all have the luxury of testing servers and sandbox environments. I for one, confess to developing on live websites even during peak web traffic times.
If you’d like to lessen customer support requests due to an inadvertent display:none; property assignment on the log-in box — use the Web Developer extension to effortlessly check your XHTML modifications before you commit them to the server.
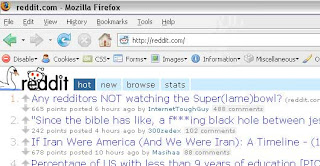
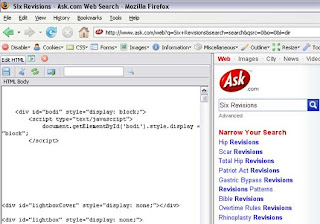
Here’s an (extreme) example of how I was able to change a few of reddit’s XHTML markup.
The original front page:


As you can see in the above picture, I changed the top three stories (to something else I’d much read about) and modified the background color to pink (I have an odd affection towards hot pink for some reason).

Tip: You can change the position of the Edit HTML panel by clicking on the Position icon (right next to the Edit HTML tab on the above screenshot).
To change the CSS styles of the page, use the CSS > Edit CSS option, which will allow you to edit the styles used on the web page.
2) Measure things quickly with the Ruler Tool.
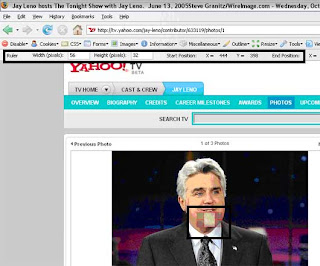
Raise your hand if you’ve ever print-screen’ed, and then copy-&-paste’d the screenshot onto Photoshop just to determine dimensions of certain page objects (like the width of an image) with the selection tool. *Raises hand in shame*
With the Ruler Tool (enable it via Miscellaneous > Display Ruler Tool), you can speedily size-up objects inside the web browser. It’s a great tool in conjunction with outline options such as Information > Display Div Order option or Information > Display Block Size option, allowing you to detect the amount of padding and margin between elements.


No comments:
Post a Comment